Overview
The simple workflow.
AMs only need to follow five steps: collect the right files, ask Codex to generate the report, let Codex publish the complete package to Cloudflare Pages, and QA the live link.
Collect source files
Add client notes and source files to the EOM Reports Notion database, then export the Notion page as the source ZIP.
Generate with Codex
Use the approved prompt. Codex should stop and ask questions if required data is missing or unclear.
Let Codex deploy
Codex should publish the report folder containing index.html and the generated assets folder.
Before Codex
Prepare a clean report folder.
The cleaner the source files are, the fewer questions Codex needs to ask and the less chance there is of missing data.
Name it clearly, for example on-point-dental-may-2026-report.
Include the exported Notion ZIP file, the client logo, and the HTML report template.
The exported Notion ZIP should contain the markdown, CSV if included, and exported assets from the Notion page.
Rename vague files like image-1.png to something useful like client-logo.png, implant-reel-preview.png, or campaign-preview.png.
Codex Build
Generate the report with the approved prompt.
Codex should preserve the design and replace the sample content only with supported client data. If important data is missing, it should stop and ask questions.
Use source-backed details
- Use numbers only if they appear in supplied files.
- Write insights that connect to evidence.
- Keep the report client-friendly and strategic.
- Ask for missing logos, grids, or content links before generating.
Avoid guessing
- Do not invent patient numbers or rankings.
- Do not add generic opportunities without evidence.
- Do not leave sample placeholders in the final report.
- Do not upload only the HTML if the report uses local images.
Copy Prompt
Approved EOM report generation prompt.
Paste this into Codex after attaching the report template, Notion export, exported assets, and client logo.
You are generating a client-facing End of Month Report for a Shoutout Digital client.

FILES ATTACHED

* EOM Report Template (HTML)
* Notion Export (Markdown + exported assets)
* Client Logo

The HTML template is the design and structure reference.

Preserve:

* Layout
* Styling
* Colours
* Typography
* Animations
* Navigation
* Section structure
* Overall premium look and feel

Replace all sample content with actual client data.

The attached files are the source of truth.

Do not invent metrics, rankings, patient numbers, insights, opportunities, recommendations, conclusions, or performance changes.

---

PRIMARY OBJECTIVE

Generate a premium End of Month Report that clearly answers:

1. What happened this month?
2. What did Shoutout Digital learn, improve, analyse, optimise, or deliver?
3. What are we doing next month?

The report should feel like a strategic business review prepared by a senior marketing consultant.

The audience is:

* Dental Practice Owners
* Principal Dentists
* Practice Managers

Assume they are busy and will skim the report.

Prioritise clarity and business outcomes.

---

EXECUTIVE SUMMARY

Create a concise executive summary that highlights:

* Biggest win
* Strongest performance area
* Main opportunity
* Primary focus for next month

This section should be understandable in under 30 seconds.

Avoid technical jargon.

---

HERO PRIORITY CARD

The final card in the hero section is one of the most important elements in the report.

Do not use generic labels such as:

* Follow-Up
* Optimisation
* Growth
* Improvement
* Strategy

Instead generate a specific and actionable business priority based on the report findings.

Examples:

* Improve Booking Conversion
* Increase Implant Consultations
* Generate More Invisalign Enquiries
* Increase Treatment Acceptance
* Improve Lead Follow-Up
* Increase New Patient Volume
* Strengthen Patient Reactivation
* Improve Local Visibility

Maximum:
2-4 words

The card should communicate the single most important focus for the upcoming month.

---

WHAT WE LEARNED THIS MONTH

This section should focus on the most important findings, discoveries, improvements, opportunities, and strategic observations identified during the month.

Do not simply list activities completed.

Avoid cards such as:

* Search themes identified
* Ads optimised
* Creative analysed
* Audience reviewed
* Campaign managed

Instead surface meaningful client-facing insights.

Examples:

* Strongest Result
* Growth Opportunity
* Best Performing Channel
* Key Learning
* Strategic Opportunity

Every card should answer:

"What did we learn?"

not

"What did we do?"

Focus on insights, not activities.

---

KEY INSIGHTS & STRATEGIC FINDINGS

Use the attached reports, screenshots, notes, and supporting assets.

Extract and summarise:

* Winning creative angles
* Winning hooks
* Winning offers
* Best performing campaigns
* Strongest referral sources
* Best performing content
* Top opportunities
* Risks identified
* Recommended actions

This section should make the client feel:

"We understand what is working and why."

---

CREATIVE DELIVERED THIS MONTH

Use supplied content links and assets.

Show:

* Reels
* Graphics
* Blogs (if any)
* Landing pages (if any)

Keep descriptions concise.

Focus on purpose and value.

Avoid generic descriptions.

Explain why the content was created and what objective it supports.

---

RESULTS SECTION

Prioritise business outcomes.

Focus on:

* New Patients
* Contacts
* Opportunities
* Booked Appointments
* Attended Appointments
* Website Visitors

Explain what the numbers mean.

Do not simply display metrics.

Translate metrics into business insights.

Focus on trends, growth, opportunities, and business impact.

---

CHANNEL PERFORMANCE

Summarise:

* Google Ads
* Meta Ads
* SEO
* GBP

Focus on:

* What worked
* Why it mattered
* Opportunities moving forward

Avoid excessive technical reporting.

Write for business owners, not marketers.

---

WINS & OPPORTUNITIES

Generate:

* Biggest Win
* Strongest Growth Area
* Best Performing Channel
* Biggest Opportunity
* Area To Watch
* Strategic Insight

Keep this section highly scannable.

Each item should be concise and meaningful.

---

NEXT MONTH ACTION PLAN

Generate a practical action plan.

For each action include:

* What we are doing
* Why we are doing it
* Expected outcome

Recommendations must be supported by the supplied data.

Avoid generic recommendations.

Avoid vague statements.

Recommendations should clearly connect to findings identified in the report.

---

TONE & STYLE

The report should feel:

* Professional
* Strategic
* Premium
* Client-friendly
* Insightful

It should not feel:

* Overly technical
* Agency-centric
* Like a marketing dashboard
* Like an internal report
* Like a task list

Write for business owners, not marketers.

Prioritise clarity over jargon.

---

MISSING DATA & VALIDATION CHECK

Before generating the report, review all supplied files and data.

If any required information is missing, unclear, inconsistent, incomplete, or cannot be confidently determined from the supplied files:

STOP.

Do not generate the report yet.

Instead, ask the user a concise list of clarification questions first.

Examples:

* Missing logo
* Missing specialist report or source export
* Missing content links

Only proceed with report generation once sufficient information has been provided.

If all required information is available and there are no material gaps, proceed directly with report generation without asking questions.

Never guess, estimate, fabricate, or assume data that is not present in the supplied files.

---

FINAL QUALITY CHECK

Before finalising:

* Replace all sample content.
* Verify insights are supported by supplied data.
* Highlight wins, opportunities, and next actions.
* Remove unnecessary jargon.
* Ensure every section provides value.
* Ensure the report demonstrates Shoutout Digital's expertise and strategic thinking.
* Ensure the report focuses on insights and outcomes rather than activities.

The final report should feel like a premium monthly business review prepared by senior consultants for a dental practice owner.
Report Package
Codex should generate the assets folder for you.
When Codex creates a deploy-ready report, it should provide a complete folder with index.html and assets/. AMs do not need to manually build the assets folder, but they should verify it is included before publishing.
client-name-eom-report/
├── index.html
└── assets/
    ├── client-logo.png
    ├── content-preview-1.png
    ├── content-preview-2.png
    ├── report-chart-or-screenshot.png
    └── content-preview-or-screenshot.png
assets/ folder. The image paths inside the report should look like assets/client-logo.png, not a local computer path like /Users/name/Desktop/logo.png.Codex Autopublish
Let Codex publish the report for you.
Each AM can connect their own Cloudflare account once, then ask Codex to publish completed report folders directly to Cloudflare Pages.
Repeat monthly reports
Use this when a client gets a new report each month and you want Codex to publish without manual drag-and-drop.
Your Cloudflare account
Log in to your own Cloudflare account once. After that, Codex can deploy report folders when you ask.
Open Cloudflare PagesFinal QA
Even if Codex publishes the report, the AM should still open the live link and check content, images, mobile view, and links.
One-time setup
Connect your Cloudflare account to Codex.
Use your own Cloudflare account. Go to Cloudflare Pages or Workers & Pages.
Wrangler is Cloudflare's publishing tool. Codex can run the login/setup command and tell you what to approve.
If a Cloudflare login page opens, sign in and approve access. Do not paste passwords or private API tokens into the report.
Use a project name like client-name-eom-reports. Codex can reuse that project for the next monthly deployment.
Setup prompt
Ask Codex to set up publishing.
Please help me set up Codex so it can publish my EOM report folders to my Cloudflare Pages account.

Please:
1. Check whether Wrangler is available.
2. If needed, guide me through Cloudflare login.
3. Tell me where to find my Cloudflare Account ID.
4. Confirm the project name format I should use.
5. Do not store or paste any private token inside the report files.
AM prompt
What to ask Codex after the report is ready.
If the report was generated in the same Codex chat, Codex should already know which deploy-ready folder to publish. The AM only needs to provide the Cloudflare Pages project name.
Please publish the completed EOM report from this chat to Cloudflare Pages.

Cloudflare Pages project name:
[paste project name here, e.g. client-name-may-2026]

Please confirm before deploying that:
1. You are publishing the latest deploy-ready report package from this chat.
2. The package contains index.html.
3. The package contains an assets/ folder.
4. The HTML uses relative asset paths like assets/client-logo.png.
5. No sample placeholders remain.

After deploying, please include the live pages.dev URL in your reply and remind me what to QA before sending it to the client.
Manual Backup
Manual upload if Codex is not publishing.
Codex autopublish is the preferred workflow. Use Direct Upload as a fallback if you need to publish the package yourself.
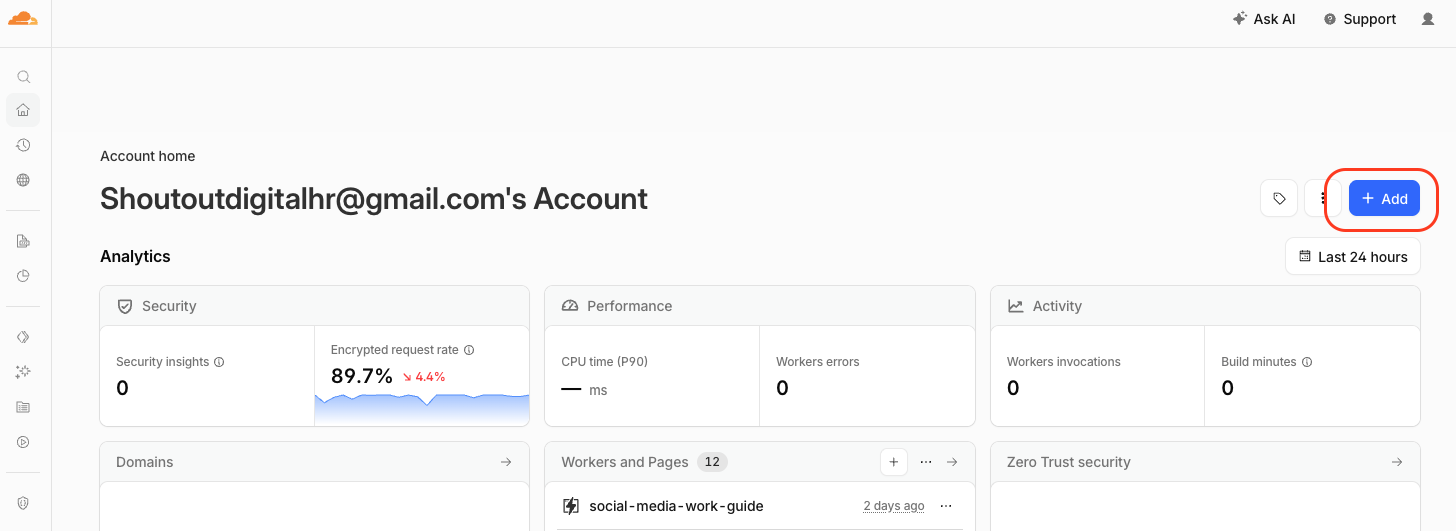
Click Add in Cloudflare.
From the Cloudflare dashboard, click the blue Add button in the top-right corner.
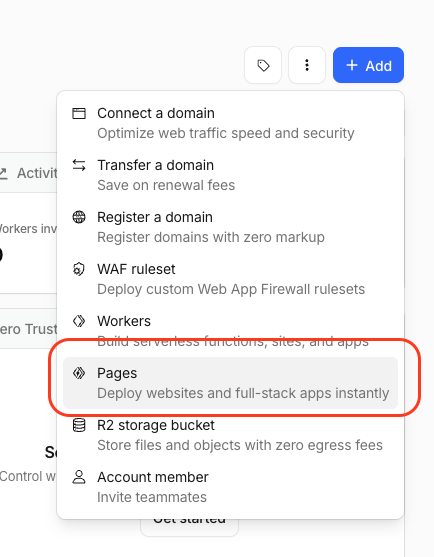
Select Pages.
In the Add menu, choose Pages. This is the option for deploying static websites and report pages.
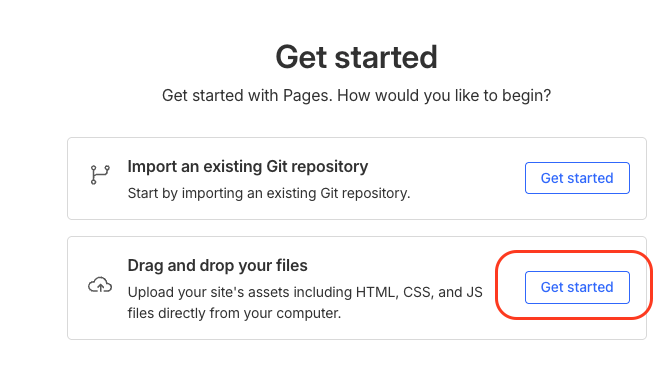
Choose drag and drop.
Select Drag and drop your files, then click Get started. This is the easiest manual upload method.
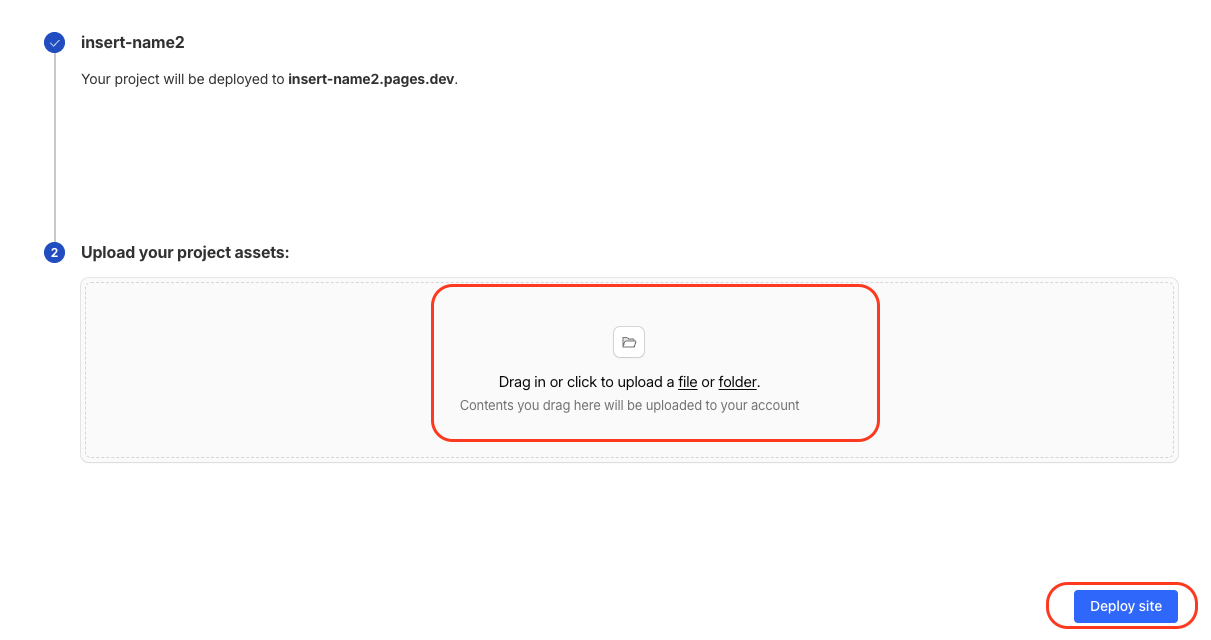
Name the report project.
Use a clean project name like client-name-month-report, then click Create project. This becomes part of the pages.dev URL.

Upload and deploy.
Upload the full deploy-ready folder or ZIP from Codex. It should contain index.html and assets/. Then click Deploy site.
Report Edits
Ask Codex to update the report after review.
AMs can request small changes using screenshots, replacement wording, or clear notes. Codex should update the HTML, refresh the deploy package, and republish if needed.
Show the exact area
Attach a screenshot and circle or describe the section that needs changing.
Give the new wording
Tell Codex exactly what should replace the old text, especially for client-sensitive statements.
Ask for a refreshed link
If the report is already live, ask Codex to update the package and publish the corrected version.
Copy Prompt
Simple edit request prompt.
Please update this EOM report.

I attached a screenshot of the part I want changed.

Change requested:
[describe the section or screenshot area]

Replace this wording:
[paste old wording if available]

With this wording:
[paste exact new wording]

Please keep the same design, layout, colours, animations, and mobile responsiveness.

After editing, please:
1. Update the HTML file.
2. Refresh the deploy-ready package with index.html and assets/.
3. If the report is already published, republish it to Cloudflare Pages and give me the updated live URL.
QA Checklist
Check the live link before sending.
This should take two minutes and prevents the most common client-facing issues.
No placeholders
Check there are no sample names, bracket placeholders, or unsupported claims left in the report.
Images load
Confirm the logo, content previews, report charts, and other visual assets appear correctly.
Phone view works
Resize the browser or open the link on your phone. Check hero stats, cards, and long text labels.
Links open
Test Google Drive content links, preview buttons, and navigation anchors.
Skimmable story
The report should clearly answer what happened, what we learned, and what we are doing next.
Share cleanly
Copy the final Cloudflare Pages URL into the client update or report delivery email.